
Looking for a special dessert that will leave your guests filled with awe? Look no further than Steph’s “Cho-ffee” Lava Bombe recipe. This delicious dessert combines the soft texture of a chocolate mousse with the rich flavor of coffee, making it a dream come true for any sweet tooth.
The first step in making this frozen treat is to whip up the egg whites until they form stiff peaks. Don’t be tempted to rush this step – the whites need to be really stiff in order to hold their shape during the freezing process. Next, gently fold in the sugar and chopped strawberries into the egg white mixture.
In a separate bowl, combine the melted dark chocolate, coffee syrup, and egg yolks. Mix them together until they are well combined and smooth. Carefully fold this mixture into the egg whites, being careful not to break down the whites too much.
Once the mousse mixture is ready, it’s time to assemble the lava bombe. Line a glass bowl or mold with plastic wrap, allowing the excess to hang over the sides. Pour in the mousse mixture and smooth it out so it fills the base of the bowl. Take your favorite Valentine’s Day cookies and arrange them around the edge of the mousse, pressing them gently into the mixture.
Place the bombe in the freezer and let it set for at least 6 hours, or overnight. When you are ready to serve, gently pull the edges of the plastic wrap to remove the bombe from the bowl. Return it to the freezer while you prepare the mirror glaze.
To make the mirror glaze, combine the dark chocolate, sugar, and water in a saucepan over low heat. Stir until the chocolate is melted and the mixture is smooth. Remove from the heat and let it cool for a few minutes.
Take the frozen lava bombe out of the freezer and place it on a plate. Carefully pour the mirror glaze over the bombe, making sure to cover it completely. Allow the glaze to set for a few minutes, then use a spoon to drizzle any remaining glaze over the top.
You can choose to decorate the bombe with some chocolate curls, chopped almonds, or simply leave it as is. Either way, this dessert is sure to impress your guests with its stunning appearance and delicious taste. So why wait? Make Steph’s “Cho-ffee” Lava Bombe recipe and indulge in a truly decadent treat!
Steph’s “Cho-ffee” Lava Bombe Recipe: Delicious Dessert Ideas
If you’re looking for a decadent dessert that combines the rich flavors of chocolate and coffee, look no further than Steph’s “Cho-ffee” Lava Bombe recipe. This delightful treat is sure to impress your family and friends, and it’s surprisingly easy to make.
To start, gather your ingredients. You’ll need dark chocolate, coffee, sugar, eggs, and a few other pantry staples. Begin by whisking together the egg yolks and sugar until they are pale and thick.
Next, melt the dark chocolate over a double boiler until it is smooth and glossy. Slowly pour the melted chocolate into the egg yolk mixture, stirring constantly to prevent the eggs from cooking. Set this mixture aside and let it cool for a few minutes.
In a separate bowl, whisk the egg whites until soft peaks form. Gradually add the coffee to the egg whites, whisking constantly. Fold this mixture into the chocolate mixture, being careful not to overmix.
Line a cake tin with cling film, making sure to leave enough overhang to easily remove the dessert later. Pour the chocolate and coffee mixture into the tin, smoothing it out to create an even layer.
Next, create the lava-filled center by using creative techniques. You can add a layer of crushed cookies, a thinned layer of chocolate, or even a pool of caramel or raspberry jam. The choice is yours and the possibilities are endless.
Once your center is complete, cover it with another layer of the chocolate and coffee mixture, making sure to seal the edges. Pop the tin into the fridge for a few hours to allow the dessert to set.
When you’re ready to serve, remove the Lava Bombe from the tin and place it on a serving plate. Pour some chocolate sauce or fruit juice over the top to create a glossy mirror-like finish.
You can serve the Lava Bombe as is, or get a little more creative with your presentation. Dip some fresh fruit or cookies into the chocolate sauce and place them around the dessert. You can even sprinkle some chopped nuts or edible flowers on top for an extra touch of elegance.
Steph’s “Cho-ffee” Lava Bombe is the perfect Valentine’s Day treat, but it can be enjoyed any time of the year. Its combination of rich chocolate and aromatic coffee is a match made in dessert heaven. So give it a try and let your taste buds fall in love with this divine dessert.
Instructions
1. In a large mixing bowl, combine the whipping cream and sugar. Using a mixer on medium-high speed, whip the cream until stiff peaks form.
2. Gently fold in the melted dark chocolate until well combined.
3. Line a plate or tray with plastic wrap and spoon the whipped cream mixture onto it, forming a round cake shape. Use a spoon to make a small well in the center of the cake.
4. In a separate bowl, combine the chopped almonds and liqueur. Fill the well in the cake with this mixture.
5. Place the cake in the fridge and let it chill for at least 4 hours, or overnight if possible.
6. Once the cake has chilled, remove it from the fridge and carefully peel off the plastic wrap.
7. In a microwave-safe bowl, melt the remaining dark chocolate and carefully spoon it over the cake, making sure to cover the whole surface.
8. Return the cake to the fridge and let it set for another 30 minutes, or until the chocolate has hardened.
9. In a small bag, crush some of the leftover almonds to create a coarse almond powder.
10. Fill a saucepan with water and place a thermometer inside. Heat the water until it reaches 58°C (135°F).
11. Dip the base of the cake into the hot water, holding it for a few seconds to slightly thin the chocolate. This will make it easier to remove the cake from the plate.
12. Carefully lift the cake from the plate and place it on a presentation stand.
13. Using a brush, gently brush the cake with some edible gold glitter or dust for a special touch.
14. Slice the cake and serve with fresh strawberries on the side. Enjoy!
Can This Chocolate Bag Be Made in Advance?
If you’re planning to make Steph’s “Cho-ffee” Lava Bombe dessert, you may be wondering if the chocolate bag can be made in advance. The short answer is yes, it can! Making the chocolate bag ahead of time can save you some stress on the day of serving.
To make the chocolate bag, you’ll need dark chocolate, a piping bag, and a glass or bowl to hold the bag while it sets. Start by melting the chocolate and then transferring it to the piping bag. Using a method of your choice, pipe the melted chocolate onto the glass or bowl, creating a bag shape. Make sure not to make it too thin, as it needs to hold its shape once it cools and hardens.
Once the chocolate bag is piped and shaped, let it cool and set completely. If you have limited time, you can place it in the refrigerator to speed up the process. Once the chocolate has hardened, gently remove the bag from the glass or bowl, being careful not to break it.
You can store the chocolate bag in an airtight container or covered with plastic film and keep it at room temperature until you’re ready to use it. However, it’s best to make the chocolate bag no more than a day in advance to ensure its freshness and stability.
When it’s time to serve the dessert, fill the chocolate bag with the cho-ffee lava bombe mixture. This mixture is a combination of whipped cream, chocolate mousse, chopped almonds, and a hint of liqueur for added flavor. If you prefer, you can also fill the bag with other sweet treats like fresh fruit, cake, or even a mirror glaze for a different presentation.
To be sure that the chocolate bag doesn’t leak or break while filled, you can brush the inside with a little melted chocolate to create a seal. Then, gently spoon or pipe in the prepared mixture. Make sure not to overfill it, as the dessert may become messy when you try to eat it.
If you’re pressed for time on the day of your event, you can even freeze the filled chocolate bag. Just make sure to wrap it tightly in plastic film or place it in an airtight container before freezing. After a few hours in the freezer, it will be like a frozen dream come true!
So, go ahead and make the chocolate bag in advance. It’s a fun and creative way to elevate your dessert presentation and impress your guests. They’ll surely enjoy the edible vessel filled with all the delicious goodies inside!
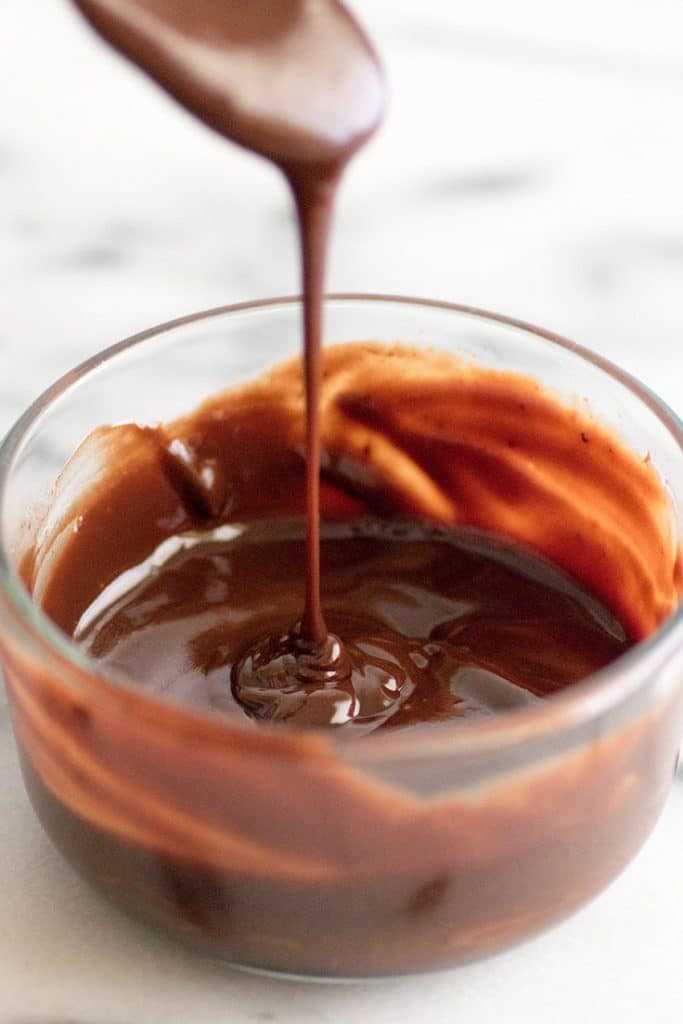
Chocolate Bag: My Chocolate Is Too Thick, How Can It Be Thinned out?
If you find that your chocolate is too thick and you want to thin it out for a specific recipe or presentation, there are a few ways you can achieve a smoother consistency. Here are some instructions on how to thin out your chocolate:
1. Melt the chocolate: If your chocolate is too thick, it may be because it has cooled down and hardened. Start by melting the chocolate in a microwave or using a double boiler method. Be sure to melt it slowly and stir regularly to avoid burning.
2. Add a little liquid: Once the chocolate has melted, you can add a small amount of liquid to help thin it out. You can use milk, cream, or even a flavored liqueur like rum or coffee liqueur. Add the liquid a little at a time and whisk it into the chocolate until you achieve the desired consistency.
3. Use some fat: Another way to thin out your chocolate is by adding a small amount of fat. This can be in the form of vegetable oil, coconut oil, or even butter. Like the liquid, add the fat gradually and whisk it into the chocolate until it becomes smoother.
4. Heat the chocolate: If your chocolate is still too thick after adding liquid or fat, you can try heating it up again. Place the chocolate back on low heat and stir continuously until it becomes smoother and thinner.
Remember, when thinning out your chocolate, it’s important not to add too much liquid or fat at once, as this can cause the chocolate to seize or become lumpy. Take your time and be patient, adding a little at a time until you achieve the desired consistency.
By following these instructions, you should be able to successfully thin out your chocolate and use it for various desserts and presentations. Whether you’re making a chocolate bag filled with mousse or piping chocolate decorations onto a cake, having the right consistency is crucial for a successful dessert.
Ingredients
For this sweet and frozen dessert, you’ll need the following ingredients:
Base
– 250g of dark chocolate, melted
– 200g of almonds, chopped
Lava Bombe
– 6 egg whites
– 6 egg yolks
– 150g of sugar
– 100ml of lemon juice
– 1 teaspoon of lemon zest
– 500ml of whipping cream
Toppings
– Edible decorations (optional)
– Fresh strawberries or other fruits (optional)
Make sure to have a glass plate or serving dish ready, as well as a piping bag or spoon for decorating.
Tribes During Deployments: We Were Family
These tribes, much like families, become a source of strength and comfort during deployment. They share experiences, offer advice, and lend a helping hand when needed. It’s not uncommon for these tribes to organize various activities and events to make the time apart a little easier to bear.
One common way tribes come together is through the sharing of meals and desserts. Families take turns hosting gatherings, where everyone brings a dish to share. Desserts, in particular, have a special place in these gatherings, as they bring a touch of sweetness and joy to the occasion.
One dessert that was always a hit during our deployments was a “Cho-ffee” Lava Bombe, made by my dear friend Steph. This delicious treat became a symbol of unity and togetherness for our tribe.
The “Cho-ffee” Lava Bombe is a creative and decadent dessert that combines the richness of chocolate and the smoothness of mousse. Steph would start by making a dark chocolate mousse, using eggs, sugar, and melted dark chocolate. The egg whites were whisked until stiff, while the yolks were combined with sugar and gradually added to the melted chocolate.
Once the mousse was made, Steph would line a glass bowl with cling film and layer it with chocolate mousse and cookies soaked in coffee liqueur. She would then add a thin layer of almonds and freeze the bowl for at least 4 hours or until firm.
When it was time to serve, Steph would remove the bowl from the freezer and gently turn it upside down onto a plate, carefully removing the cling film to reveal a beautiful dome-shaped cake. The melted chocolate from the mousse would create a mirror-like glaze, making for an impressive presentation.
To add an extra special touch, Steph would dip strawberries in melted dark chocolate and place them around the base of the bombe. The strawberries added a burst of freshness to the rich dessert and made it even more irresistible.
Every time Steph made the “Cho-ffee” Lava Bombe, it felt like a celebration. It brought our tribe together, reminding us that even during deployment, we were surrounded by a family that cared for each other.
Years have passed since those deployments, but the memories of our tribe and the “Cho-ffee” Lava Bombe remain etched in our hearts. It’s truly amazing how a dessert can create such a strong bond and provide comfort during challenging times.
If you’re looking to make a dessert that not only satisfies your sweet tooth but also brings people together, give the “Cho-ffee” Lava Bombe a try. It’s a treat that goes beyond its delicious taste – it represents the power of family, even when miles apart.
This Chocolate Bag is Edible
If you’re looking for a creative and delicious dessert idea that will wow your family and friends, then look no further than this edible chocolate bag. Made from a combination of sweet chocolate, fresh strawberries, and a special liqueur, this dessert is sure to be a hit at your next gathering.
To make the chocolate bag, start by melting the chocolate in a double boiler or using a microwave. Once melted, thinned it out with a little bit of syrup or juice to make it easier to work with. Then, using a piping bag or a spoon, carefully pour the melted chocolate onto a mirror or other smooth surface, forming the shape of a bag. Let it cool and harden in the fridge or overnight.
While the chocolate bag is setting, you can prepare the other ingredients. Whip up a batch of fresh strawberry mousse using strawberries, sugar, and egg yolks. In a separate bowl, whisk the egg whites until they form stiff peaks. Gradually fold the egg whites into the strawberry mixture until well combined. Set this aside in the fridge.
Once the chocolate bag is completely hardened, carefully break away the mirror or smooth surface it had set on. Gently peel away any excess chocolate that may have stuck to the bag. Fill the chocolate bag with the prepared strawberry mousse, being careful not to overfill.
To serve, place the filled chocolate bag on a serving plate or platter and surround it with cookies or other sweet treats. You can also brush the bottom of the bag with a little bit of melted chocolate to help it stand upright. If desired, you can also add a dollop of whipped cream on top for added sweetness.
This edible chocolate bag is not only delicious, but it also makes for a stunning presentation. It’s a fun and unique dessert that is sure to impress your guests. So why not give it a try for your next special occasion or Valentine’s Day celebration? Your friends and family will be falling in love with this dreamy dessert!
This chocolate bag dessert is one of the most creative ways to display sweet treats: Chocolate Bag for Valentine’s Day Edible with Strawberries
Looking for a unique and delicious dessert to impress your loved one this Valentine’s Day? Look no further than this chocolate bag dessert with edible strawberries. The presentation alone will be enough to wow your sweetheart!
To make this decadent dessert, you will need the following ingredients:
- Dark chocolate
- Strawberries
- Almonds (chopped)
- Whipped cream or mousse
- Cookies
- Chocolate syrup
To start, melt the dark chocolate in a microwave-safe bowl, stirring it every 30 seconds to make sure it doesn’t burn. Once it is completely melted, set it aside to cool.
While the chocolate is cooling, dip the strawberries in the chocolate syrup and set them aside on a baking sheet lined with parchment paper. This will create a glossy and sweet coating on the strawberries.
In a separate bowl, whip the cream or make your favorite mousse recipe. Once the chocolate has cooled enough, you can start assembling the chocolate bags.
Take a piping bag and cut a small hole in the bottom. Spoon a small portion of the whipped cream or mousse into the bag, and then pipe it into the chocolate bag. Repeat this process until all the chocolate bags are filled.
In the meantime, take some cookies and break them into small pieces. These will be used as the base for your dessert. Spread the cookie pieces on a plate and brush them with some thinned chocolate syrup. This will create a tasty and crunchy base for your chocolate bags.
Once the chocolate bags are filled and the base is ready, you can start assembling the dessert. Place a chocolate bag on top of the cookie base and garnish it with some chopped almonds. You can also add some strawberries around the plate for an extra touch of sweetness.
For the finishing touch, drizzle some chocolate syrup over the dessert for added decadence. Refrigerate the dessert for at least a few hours or overnight to allow it to set.
When it’s time to impress your loved one, remove the dessert from the fridge and serve it on a plate. The chocolate bag will hold its shape, and your sweetheart will be amazed by your creativity and culinary skills.
So, instead of the usual chocolates and flowers this Valentine’s Day, try this unique and delicious chocolate bag dessert. It’s sure to be a hit!
Can Sugar Free Chocolate Be Used To Make This Bag: Chocolate Bag for Valentine’s Day with Strawberries and Cookies Falling Out
If you’re looking for a delicious and unique way to impress your special someone this Valentine’s Day, consider making a chocolate bag filled with strawberries and cookies. This sweet treat is sure to be a hit and can be made even healthier by using sugar-free chocolate. Here’s how to create this edible work of art:
- Start by gathering your ingredients. You will need sugar-free chocolate, strawberries, and cookies of your choice. Make sure the chocolate is in a solid form that can be melted.
- Next, prepare the chocolate bag by melting the sugar-free chocolate. You can do this by using a double boiler or by slowly melting the chocolate in the microwave. Be sure to stir the chocolate frequently to prevent burning.
- Once the chocolate has melted and is smooth, remove it from the heat. Allow it to cool slightly, but make sure it doesn’t harden completely. You want it to be pliable enough to work with.
- While the chocolate is cooling, prepare your strawberries and cookies. Wash the strawberries and pat them dry. Chop the cookies into bite-sized pieces. Set aside.
- Once the chocolate has cooled but is still soft, transfer it to a piping bag or a plastic bag with the corner snipped off. Pipe the chocolate onto a baking sheet lined with parchment paper in the shape of a bag. Start by creating the base of the bag and then build up the sides. Make sure the edges are thick enough to hold the weight of the strawberries and cookies.
- Once you have shaped the bag, place it in the freezer to set. This will take a few hours, so it’s best to do this step in advance.
- While the bag is freezing, you can prepare the strawberries and cookies. Dip the strawberries into the melted sugar-free chocolate and place them on a separate baking sheet lined with parchment paper. Allow them to harden in the refrigerator.
- Once the bag and the strawberries have hardened, it’s time to assemble the dessert. Gently remove the chocolate bag from the freezer and carefully cut away any excess chocolate to create an opening at the top.
- Fill the bag with the chocolate-dipped strawberries and the chopped cookies. Be creative and make sure the treats are falling out in an enticing way.
- For a special touch, you can use a mirror or another flat surface to display the chocolate bag. Sprinkle some powdered sugar or thinned sugar-free chocolate over the plate to enhance the presentation.
- Now you’re ready to surprise your loved one with this delicious and beautiful dessert. Enjoy!
Note: Sugar-free chocolate can sometimes be slightly softer than regular chocolate, so make sure to have it thoroughly chilled before using and handle it gently to avoid melting.
FAQ
Can I make the chocolate bag in advance?
Yes, you can make the chocolate bag in advance. It can be stored in an airtight container at room temperature for up to 2 days.
What ingredients do I need to make the chocolate bag dessert?
To make the chocolate bag dessert, you will need 8 ounces of semi-sweet chocolate, 16 ounces of strawberries, 8 heart-shaped cookies, and parchment paper.
Is the chocolate in the bag edible?
Yes, the chocolate bag is edible. It is made from melted chocolate that hardens into a sturdy bag shape.
How can I thin out my thick chocolate?
If your chocolate is too thick, you can add a small amount of vegetable oil or melted butter to thin it out. Start with a teaspoon and add more if needed, stirring until you reach the desired consistency.