If you’re a fan of hot chocolate, then you’re in for a treat. Making your own homemade hot chocolate truffles is a totally achievable and enjoyable process that will seriously impress yourself and any lucky recipients. Plus, it’s a fun and festive activity that you can do with friends or family. So, let’s dive in and discover the magic of making these decadent delights!
To start, you’ll need a few key ingredients: milk, water, chocolates, and some extras to add flavor and texture. The best part is that you probably already have most of them in your pantry or fridge. You can use any type of chocolate you like, from dark to white. And if you’re feeling really fancy, you can even mix and match different types to create a unique flavor profile.
Next, you’ll want to melt the chocolates. This can be done using a double boiler or by melting them in the microwave. Just remember to stir the chocolates every 30 seconds to ensure they melt evenly and don’t burn. Once melted, you can add in any additional flavors or mix-ins you’d like, such as chopped nuts, dried fruit, or even a splash of your favorite liqueur.
After the chocolate is melted and mixed, it’s time to shape the truffles. To do this, you can use a small ice cream scoop or simply roll the mixture into balls using your hands. If you’re looking for a neater, more professional appearance, you can also use a truffle mold. Just make sure to lightly cover your hands or the mold with cocoa powder to prevent the truffles from sticking.
Share or comment on this article
After following Emily’s instructions, you might have been left with a messy web of melted chocolate on your countertop. But don’t worry, the results are worth it! These small balls of chocolatey goodness are a perfect treat for any chocolate lover.
To recreate the perfect round shape of the truffles, you will need to be careful while flipping them. It’s recommended to use a plate or a mold to ensure they stay evenly shaped. If you prefer a different shape, feel free to get creative – just make sure to cover them well with melted chocolate.
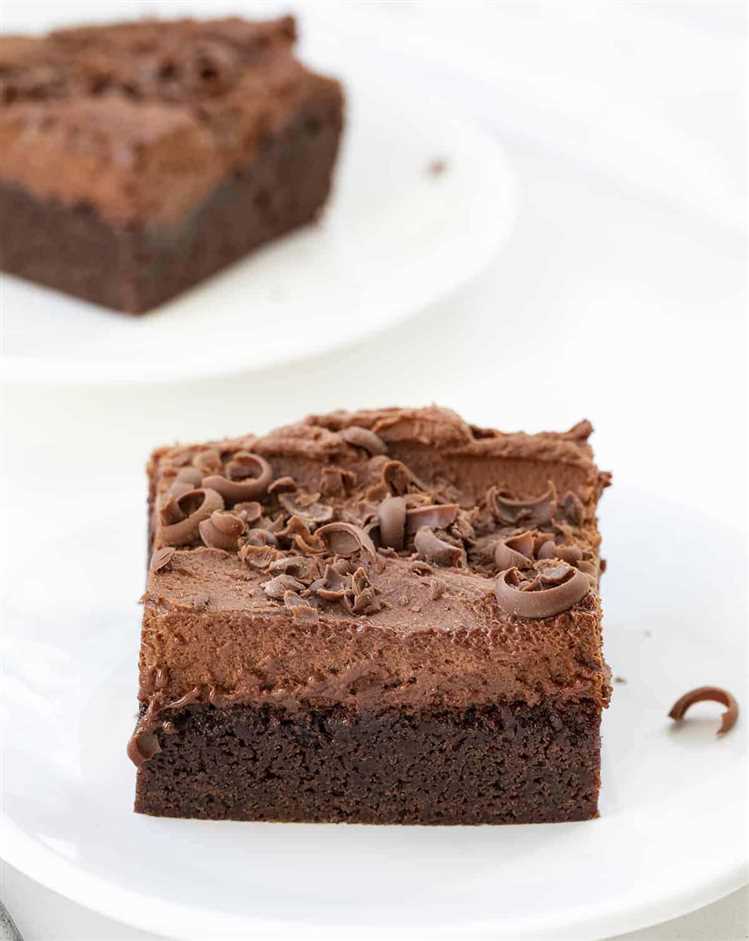
If you’re wondering about the amount of chocolate to use, the article suggests using two tablespoons of melted chocolate for each truffle. The brownie lovers out there might have even plopped a brownie inside the truffle, creating an even more decadent treat.
While the idea of making homemade hot chocolate truffles might seem messy or time-consuming, the online videos and FAQs provided in the article make the process much easier to follow. Just be careful while melting the chocolate and place it in the fridge for a few minutes to help it become solid.
Once the truffles are ready, you can share them with friends and family or comment on this article to let others know about your delicious creation. These homemade hot chocolate truffles are the perfect storm of chocolatey goodness, and they will surely be a hit wherever you take them!
- Share your hot chocolate truffle creations on social media to spread the love for this delectable dessert.
- Don’t forget to enjoy the moment when you take a bite and experience the burst of flavor.
- If you’re feeling adventurous, try different variations, such as adding nuts, caramel, or even a sprinkle of sea salt.
So go ahead and get in the kitchen, embrace the messy process, and create your own batch of homemade hot chocolate truffles. The only question now is, how many truffles is too many?
FAQs for Homemade Hot Chocolate Truffles
Here are some frequently asked questions about making homemade hot chocolate truffles:
1. What is the resulting texture of the truffles?
The truffles have a smooth and creamy texture, similar to traditional chocolate truffles.
2. Can I make hot chocolate truffles by using a different type of milk?
Yes, you can experiment with different types of milk, such as almond milk or coconut milk, to personalize the taste.
3. Where can I find the instructions for making the homemade hot chocolate truffles?
The instructions can be found in the main article above, where Emily’s recipe is shared.
4. How many truffles will this recipe make?
The number of truffles will depend on the size of the scoops you make. On average, the recipe yields about 12 truffles.
5. What can I use to shape the truffle mixture into small balls?
A small ice cream scoop or a melon baller works well for shaping the truffles.
6. How long should I refrigerate the truffles before serving?
It is recommended to refrigerate the truffles for at least 20 minutes to allow them to firm up and set.
7. Can I pour the melted chocolate into a different container than a ramekin?
Yes, you can use any small, microwave-safe container for melting the chocolate.
8. Do I need to be careful when melting the chocolate in the microwave?
Yes, it’s important to be careful when melting the chocolate to avoid burning it. Use short bursts of heat and stir in between.
9. What can I do if the truffle mixture is too messy to handle?
If the truffle mixture is too soft, you can place it in the freezer for a few minutes to firm it up before shaping.
10. Can I store the truffles in the freezer for longer-term storage?
Yes, the truffles can be stored in an airtight container in the freezer for up to a month.
Instructions
Once you have gathered all the ingredients and set your kitchen in motion, it’s time to make these delicious homemade hot chocolate truffles. Follow these simple steps to recreate the decadent dessert that has been touted as the easiest and most viral of all hot chocolate recipes:
Step 1: Melt the chocolate
Start by heating a small saucepan of water on the stovetop. Place a heatproof bowl over the saucepan, making sure it doesn’t touch the water. Pour the chocolate into the bowl and stir it occasionally as it melts. Be careful not to overheat the chocolate, as it can become solid again.
Step 2: Combine the ingredients
In a separate bowl, combine the melted chocolate with the creamy milk, stirring until well mixed. You can also add a tablespoon or two of your favorite hot chocolate mix for an extra burst of flavor.
Step 3: Shape the truffles
Pour the chocolate mixture into a round mold or ramekin, then place it in the refrigerator for about 30 minutes to an hour, until it becomes solid. Once it’s ready, remove the mold from the refrigerator and carefully plop the truffle mixture onto a plate or surface.
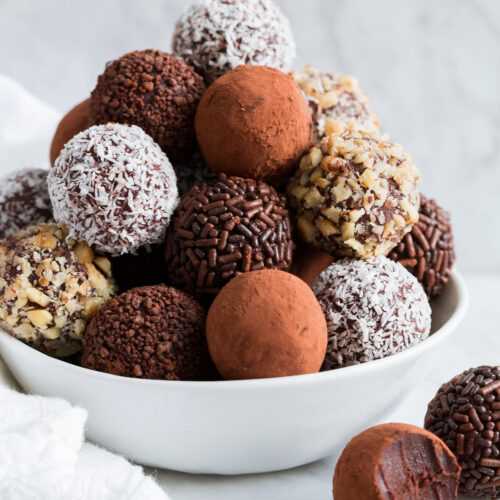
Step 4: Assembly
Using a scoop or spoon, shape the truffle mixture into small balls and place them on a plate or serving tray. You can also roll them in cocoa powder or crushed nuts for added texture and taste. If you want to recreate the viral hot chocolate bomb, try placing a small amount of hot chocolate mix, marshmallows, or raspberries in the center of each truffle ball.
Step 5: Enjoy!
Once the truffles are assembled, they are ready to be enjoyed. Serve them on a dessert plate or place them in hot chocolate glasses, pouring warm milk over them to create a silky and creamy hot chocolate. Don’t forget to stir it all together before taking that first delicious sip!
These homemade hot chocolate truffles are the perfect treat for chocolate lovers and are sure to impress your friends and family. If you have any questions, check out our FAQs section for additional tips and tricks.
Ingredients
When it comes to making delicious homemade hot chocolate truffles, the key is using high-quality ingredients. The result will be a silky, smooth, and decadent treat that will melt in your mouth. Here are the ingredients you will need:
For the Truffles:
- 2 cups of chopped semi-sweet or dark chocolate
- 1 cup of heavy cream
- 1 tablespoon of unsalted butter
- 1 teaspoon of vanilla extract
For Coating and Garnish:
- Cocoa powder
- Crushed nuts (such as almonds or hazelnuts)
- Shredded coconut
- Chocolate sprinkles
- Edible gold powder (for an extra special touch)
These ingredients can easily be found at your local grocery store or online. Take the time to gather everything you need before you start making the truffles to ensure a smooth and enjoyable cooking experience.
How to make the chocolate ball dessert taking the web by storm
If you’re a chocolate lover, chances are you have seen the viral videos of the latest dessert trend taking the internet by storm: the magic chocolate ball. This dessert, also known as a chocolate sphere or chocolate ball sundae, has become a sensation because of its mesmerizing and hypnotic assembly and serving process.
The process starts with melting high-quality chocolate and pouring it into round silicone molds or balloons. After a few minutes in the refrigerator, the chocolate hardens and is carefully removed from the molds, resulting in smooth and shiny chocolate domes.
To make the magic happen, the chocolate domes are then filled with all sorts of delicious treats. The possibilities are endless! From creamy ice cream and fresh raspberries to gooey caramel and crushed cookies, you can customize the filling to your liking.
To serve the dessert, a creamy sauce or hot liquid, such as melted chocolate or caramel, is poured over the chocolate sphere. As the sauce makes contact with the solid chocolate, it starts to melt, creating a mesmerizing effect and revealing the hidden treasures inside.
Recreating this viral dessert at home is much easier than you might think. Start by combining the chocolate and other ingredients in a saucepan over low heat until melted and well mixed. Carefully pour the melted chocolate into round silicone molds or balloons, making sure to evenly coat the surface. Place them in the refrigerator for a few minutes to harden.
After the chocolate domes have hardened, carefully remove them from the molds. You can gently flip the silicone molds or pop the balloons to release the chocolate spheres. If using balloons, make sure they are completely cooled before pouring the chocolate to avoid any accidents.
Now comes the fun part – assembling the dessert! Take a chocolate dome and carefully scoop out the center to create a hollow space for your desired fillings. Fill the cavity with ice cream, fruits, cookies, or anything you like. Place another chocolate dome on top to seal the dessert.
To serve, place the assembled chocolate ball on a plate or in a dessert glass and pour the sauce or hot liquid over it. You can use chocolate ganache, caramel sauce, or any other sauce you prefer to create a delicious surprise inside.
These chocolate ball desserts have become a favorite at dinner parties and special occasions. Your guests will be amazed by the beauty and deliciousness of this dessert. It’s a true showstopper!
If you’re looking for more inspiration or want to learn more about making chocolate truffles, be sure to check out recipes and articles online. There are plenty of step-by-step videos, FAQs, and tips to ensure your chocolate ball dessert turns out perfectly every time.
So why not try your hand at making these mesmerizing chocolate ball desserts? You can impress your friends and family with this viral sensation and share the magic with them. Get creative with your fillings and sauces, and enjoy the deliciousness that is the chocolate ball dessert taking the web by storm.
HOW TO MAKE THE MAGIC CHOCOLATE BALL SUNDAE
If you’re a chocolate lover, you might have seen videos online of the magic chocolate ball sundae, where a frozen chocolate ball filled with delicious treats is covered with hot milk, causing the ball to burst open and release its contents. Creating this dessert is not as complicated as it might seem, and the results are seriously impressive.
To start, you’ll need a small balloon or a chocolate mold in the shape of a sphere. Blow up the balloon until it’s about the size of a tennis ball or use the mold to create the chocolate ball. If using a balloon, lightly coat it with cooking spray before dipping it in melted chocolate. Place the covered balloon or mold in the fridge until the chocolate hardens, which should take about 20-30 minutes.
In the meantime, you can prepare the filling for your chocolate ball sundae. Combine your favorite ingredients, such as brownie chunks, chopped truffles, or any other sweet treats you like. You can customize it according to your preferences. Set the mixture aside for now.
Once the chocolate has hardened, remove it from the fridge and gently flip the balloon or remove the chocolate mold to reveal your chocolate ball. Using a sharp knife or scissors, carefully cut a small hole in the top of the ball. This will be the opening where the hot milk will be poured later.
Next, bring a small saucepan of water to a simmer over medium heat. Place a heatproof ramekin or small bowl on top of the saucepan, making sure it doesn’t touch the water. Add the milk and any additional flavors or spices you’d like to the ramekin, and stir occasionally until it becomes hot and steamy.
Now comes the exciting moment! Place the chocolate ball on a plate or in a bowl, and cover it with the hot milk mixture. As the milk hits the chocolate ball, it will begin to melt and burst open, revealing the delicious filling inside. The motion of the milk pouring over the chocolate ball creates a magical effect that will surely impress your guests.
Once the chocolate ball has burst open and the milk has been poured, mix everything together to create a creamy, chocolatey dessert. You can use a spoon to scoop it out and serve it in glasses or bowls.
The magic chocolate ball sundae is a perfect dessert for dinner parties or special occasions. It’s a fun and interactive treat that will leave everyone amazed. Plus, it’s a great way to showcase your homemade truffles or other sweet creations.
So, next time you’re in the mood for a chocolatey dessert with a bit of extra flair, give the magic chocolate ball sundae a try. You’ll be surprised at how easy it is to make and how much joy and excitement it can bring to the table!
FAQ
Can I use different flavors of chocolate for the truffle hot chocolate balls?
Yes, you can definitely use different flavors of chocolate for the truffle hot chocolate balls. The recipe usually calls for semi-sweet or dark chocolate, but you can experiment with flavors like milk chocolate, white chocolate, or even flavored chocolates like mint or orange. Just keep in mind that different chocolates have different melting points and textures, so you may need to adjust the recipe slightly. But overall, feel free to get creative and try different flavors to find your favorite combination!