
If you’re a fan of chocolate and peppermint, then this no-churn ice cream recipe is a must-try. Made with rich cocoa, creamy condensed milk, and a hint of refreshing peppermint, this frozen treat is perfect for those hot summer days or any time you’re craving something sweet and cool.
What makes this recipe even better is that you don’t need an ice cream churner or any special equipment. All you need are a few simple ingredients and a large bowl to mix them in. Plus, there’s no need to wait hours for the ice cream to freeze – this recipe only takes a few hours in the freezer before it’s ready to be enjoyed.
To make this delicious chocolate peppermint ice cream, start by combining the cocoa powder, condensed milk, and vanilla extract in a saucepan over medium-high heat. Stir until the mixture is smooth and well combined. Then, remove the saucepan from the heat and let it cool to room temperature.
In a separate bowl, beat the heavy cream until soft peaks form. Add a teaspoon of peppermint extract and a tablespoon of vodka to the cream, if desired, to give it an extra kick. Fold the whipped cream into the cooled chocolate mixture, being careful not to deflate the fluffy texture.
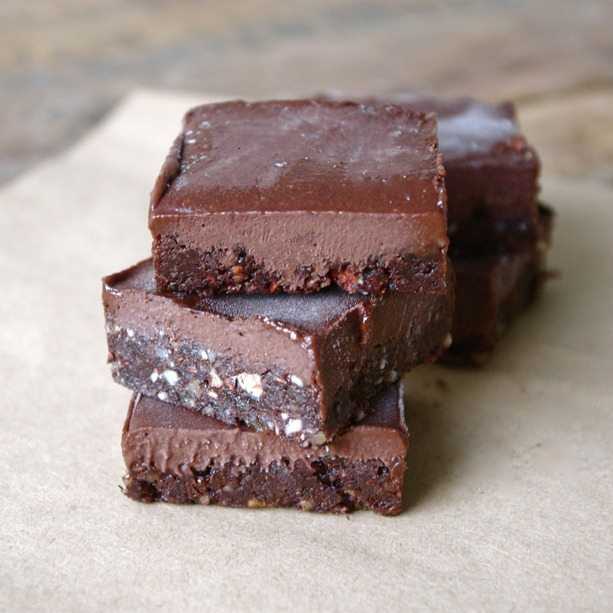
Next, line a pullman pan or a 9×5-inch loaf pan with parchment paper. Pour half of the chocolate mixture into the pan, then sprinkle a layer of chopped peppermint candies over it. Repeat with another layer of the chocolate mixture and more chopped candies. Use a knife to create swirls and streaks for an eye-catching presentation.
Now it’s time to freeze the ice cream. Cover the pan with plastic wrap and place it in the freezer for at least 4 hours, or until the ice cream is firm. If you prefer a crunchy texture, you can add some crushed peppermint cookies or your favorite mix-ins to the ice cream before freezing.
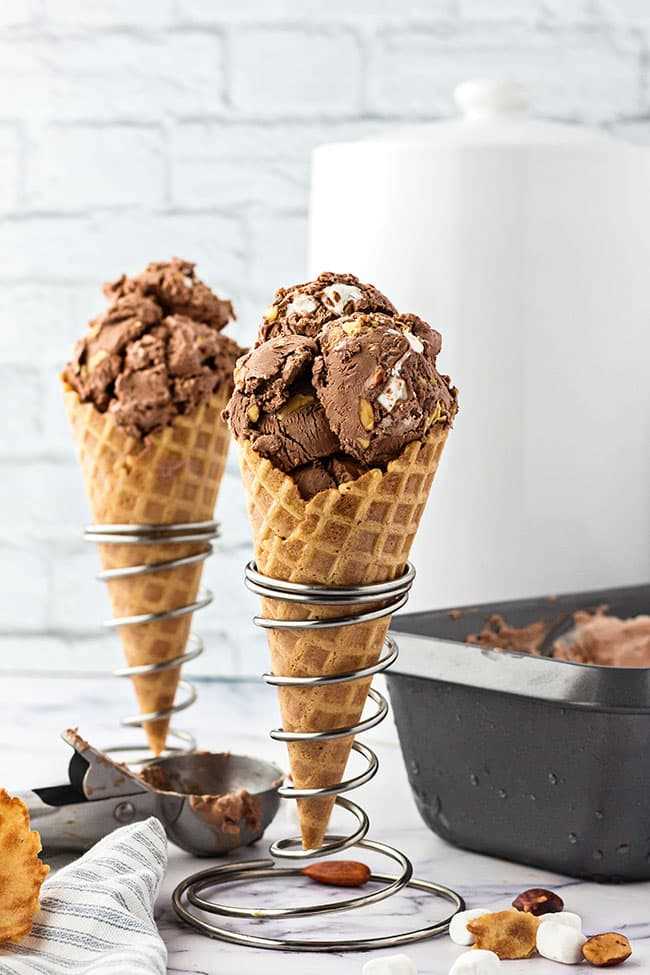
When you’re ready to serve, let the ice cream sit at room temperature for a few minutes to soften. Scoop it into bowls or on top of your favorite desserts, like warm fudge brownies or a chocolate cookie. Drizzle with chocolate sauce, if desired, for that extra touch of decadence.
This homemade chocolate peppermint ice cream is not only delicious, but it’s also free of any artificial colors or flavors. You can even customize it to your taste by adding more or less peppermint extract. So, if you’re looking for a creamy and refreshing dessert that’s easy to make at home, this is the recipe for you.
Sign up for our newsletter to receive more tasty recipes and cooking tips straight to your inbox. And don’t forget to check out our other frozen treats and dessert recipes for some sweet inspiration. Happy ice cream making!
Delicious Chocolate Peppermint Ice Cream Recipe – No Churn
If you’re looking for a refreshing and creamy treat that will delight your taste buds, look no further than this delicious chocolate peppermint ice cream recipe. And the best part? It’s no-churn, so you don’t need an ice cream maker!
One of the key ingredients in this recipe is peppermint extract, which adds a minty and refreshing flavor. You will also need cocoa powder to give the ice cream its rich chocolate taste.
To make this no-churn ice cream, start by mixing together a can of sweetened condensed milk and two teaspoons of peppermint extract in a large bowl. In a separate bowl, beat two cups of heavy cream until stiff peaks form. Then, gently fold the whipped cream into the condensed milk mixture until well combined. Be careful not to overmix, as you want to keep the mixture light and airy.
Next, add in some crushed chocolate wafer cookies to create a crunchy texture and swirls of chocolate throughout the ice cream. You can also add some chocolate fudge sauce or chocolate curls as a topping for extra indulgence.
Once everything is mixed together, pour the ice cream mixture into a loaf pan or other freezer-safe container. Make sure to smooth the top with a rubber spatula.
Place the pan in the freezer and let it freeze for at least 4 hours, or until the ice cream is completely frozen. This recipe makes about 8 servings of delicious chocolate peppermint ice cream.
While the ice cream is freezing, why not pull out your favorite peppermint treats and have a taste test? You can also sign up for the Watkins Official Instagram page for more delicious recipes and fun facts about food.
Once the ice cream is ready, scoop it into bowls or cones and enjoy the creamy, minty goodness. This ice cream is perfect for those hot summer days when you’re craving something cool and refreshing.
And here’s a fun tip: if you’re hosting a party or get-together, you can serve this chocolate peppermint ice cream alongside a warm chocolate cake for a delicious and indulgent dessert.
So go ahead and make this delicious chocolate peppermint ice cream recipe at home. It’s easy, requires no special equipment, and is sure to be a hit with both kids and adults alike. Make sure to save some for yourself, as this creamy treat will go fast!
Nutrition facts (per serving):
- Calories: 300
- Total fat: 18g
- Saturated fat: 12g
- Cholesterol: 70mg
- Sodium: 45mg
- Total carbohydrates: 30g
- Dietary fiber: 2g
- Total sugars: 25g
- Protein: 4g
One of our favorite recipes is a mouthwatering Chocolate Peppermint Ice Cream that you can make without a churn. This frozen treat is perfect for those hot summer days or any time you’re craving something creamy and refreshing.
To make this no-churn ice cream, you’ll need a large bowl to beat together the ingredients. In this recipe, we also add some Watkins Original Peppermint to give the ice cream a minty taste and a beautiful green color. If you prefer a stronger mint flavor, you can increase the amount of peppermint extract or even add a few drops of green food coloring.
In a medium-high speed mixer, beat together 2 cups of heavy cream until it becomes thick and forms stiff peaks. Then, fold in a 14-ounce can of condensed milk and 1 teaspoon of vanilla extract. Make sure to mix until there are no streaks of condensed milk left. You can also add some chopped chocolate or crushed cookies for added texture and flavor.
Once the mixture is well combined, spread it into a lined large freezer-safe container. If you like, you can also add some swirls of fudge or any other flavor of your choice. Cover the container with plastic wrap and freeze for at least 6 hours or until the ice cream is firm.
When you’re ready to serve, take the ice cream out of the freezer and let it sit at room temperature for a few minutes to soften. Using a scoop or an ice cream spoon, scoop the ice cream into bowls or cones.
The result is a creamy and refreshing ice cream with a perfect balance of chocolate and peppermint flavors. The no-churn method makes it incredibly easy to prepare, and the addition of peppermint adds a delightful twist to the classic chocolate ice cream.
So whether you’re a seasoned chef or just beginning your culinary adventure, SiteName is here to guide you with step-by-step instructions, helpful tips, and delicious recipes straight to your inbox. Sign up now and let SiteName be your trusted cooking companion!
Chocolate Peppermint Ice Cream Cake
If you’re looking for a delicious and festive dessert to impress your guests, try making a Chocolate Peppermint Ice Cream Cake. This no-churn cake is easy to make and will delight everyone’s taste buds.
To make the cake, start by crushing some chocolate cookies in a food processor or by putting them in a plastic bag and crushing them with a rolling pin. You’ll need about 2 cups of crushed cookies for the crust. In a medium bowl, mix the cookie crumbs with melted butter until well combined. Press the mixture into the bottom of a large springform pan to form the crust.
In a separate bowl, beat together condensed milk, milk, vanilla extract, and a teaspoon of peppermint extract until well combined. In another bowl, beat whipping cream on medium-high speed until stiff peaks form. Gently fold the whipped cream into the condensed milk mixture, being careful not to overmix.
If you like, you can add some chocolate chips or chopped chocolate to the ice cream mixture for an extra chocolatey flavor. You can also add a few drops of green food coloring if you want a festive green color for your ice cream.
Pour half of the ice cream mixture onto the prepared crust in the springform pan, spreading it out evenly. Drizzle some chocolate sauce and sprinkle some crushed peppermint candies or candy canes on top. Repeat this layering process with the remaining ice cream mixture, chocolate sauce, and crushed candies.
Once you’ve filled the pan, cover it with plastic wrap and freeze for at least 6 hours, or overnight if possible. This will give the cake enough time to freeze and set properly.
When you’re ready to serve the cake, remove it from the freezer and let it sit at room temperature for a few minutes to soften slightly. This will make it easier to slice and serve. You can also garnish each slice with a dollop of whipped cream, some extra crushed candies, or a drizzle of chocolate sauce.
This Chocolate Peppermint Ice Cream Cake is a perfect dessert for any occasion, whether you’re celebrating the holidays or just want a sweet treat. It’s also a great way to use up leftover candy canes or peppermint candies from Christmas. This no-churn recipe is easy to make, and the combination of chocolate and peppermint is always a crowd-pleaser.
Ingredients
- 2 cups heavy cream
- 1 can (14 ounces) sweetened condensed milk
- 1 teaspoon peppermint extract
- 1/4 teaspoon Watkins Brown Paste Food Coloring
- 1/4 teaspoon green food coloring (optional)
- 1/2 cup crushed candy cane
- 1/2 cup chopped chocolate chunks
- 1/4 teaspoon vanilla extract
- 2 teaspoons cocoa powder
- 1/2 cup chocolate cookies, crushed
- 2 teaspoons vodka (optional)
Instructions
To make this delicious chocolate peppermint ice cream, follow these easy steps:
- Line a pullman loaf pan or any other medium-sized container with parchment paper.
- In a large bowl, whisk together the heavy cream, sweetened condensed milk, cocoa powder, vanilla extract, and vodka. Whisk until completely combined.
- Next, add the crushed peppermint candies and chopped chocolate cookies to the mixture. Stir until evenly distributed.
- If you prefer a mintier taste, you can add a few drops of peppermint extract or a tablespoon of peppermint syrup to the mixture. Stir well.
- For those who like a hint of color in their ice cream, you can also add a few drops of green food coloring. Whisk until the desired color is achieved.
- Pour the ice cream mixture into the prepared pan and spread it evenly. Place a piece of parchment paper on top to prevent ice crystals from forming.
- Place the pan in the freezer and let it freeze for at least 4-6 hours, or until firm.
- Once the ice cream is frozen, remove it from the pan and let it cool on a wire rack for a few minutes.
- In the meantime, prepare the peppermint crunch layer by mixing together crushed peppermint candies and chopped chocolate cookies in a small bowl.
- Spread a thin layer of the peppermint crunch mixture on top of the cooled ice cream.
- Return the ice cream to the freezer for another 2-4 hours, or until the peppermint crunch layer is firm.
- When ready to serve, remove the ice cream from the freezer and let it soften for a few minutes.
- Scoop the creamy, minty delight into bowls or ice cream cones and enjoy!
That’s it! You’re now ready to enjoy this delicious no-churn chocolate peppermint ice cream.
Instructions
To make this delicious chocolate peppermint ice cream, follow these step-by-step instructions:
| Step 1 | In a medium saucepan, whisk together the condensed milk, cocoa powder, and chopped chocolate. Cook over medium-high heat, stirring constantly, until the chocolate is melted and the mixture is smooth. Remove from heat and let it cool. |
| Step 2 | In a large mixing bowl, combine the heavy cream, vanilla extract, and peppermint extract. Using an electric mixer on medium-high speed, beat until stiff peaks form. |
| Step 3 | Slowly fold the cooled chocolate mixture into the whipped cream, making sure to incorporate it completely without over-mixing. You want to create a creamy and smooth ice cream base with no streaks of chocolate. |
| Step 4 | If you prefer, you can add some chopped peppermint candies or crushed cookies to the ice cream base to give it extra flavor and texture. Fold them in gently with a spatula. |
| Step 5 | Transfer the ice cream mixture into a freezer-safe container. Spread it evenly and smooth the top. If you like, you can also sprinkle some additional chopped peppermint candies or crushed cookies on top as a garnish. |
| Step 6 | Cover the container with a lid or plastic wrap to prevent any ice crystals from forming. Place the ice cream in the freezer and let it freeze for at least 4 hours, or until it is completely frozen. |
| Step 7 | While the ice cream is freezing, you can make a delicious chocolate peppermint sauce or fudge sauce to serve on top. Simply melt some chocolate and stir in a few teaspoons of peppermint extract. |
| Step 8 | Once the ice cream is completely frozen, remove it from the freezer and let it sit at room temperature for a few minutes to soften slightly. This will make it easier to scoop. |
| Step 9 | Scoop the ice cream into bowls or cones and drizzle the chocolate peppermint sauce on top. You can also add some whipped cream and a sprinkle of chopped peppermint candy for an extra festive touch. |
| Step 10 | Enjoy your homemade chocolate peppermint ice cream! It’s the perfect treat to cool down on a hot summer day or to indulge in any time of the year. |
FAQ
What is the recipe for the chocolate peppermint ice cream?
The recipe for chocolate peppermint ice cream is a no churn recipe, which means you don’t need an ice cream maker. The ingredients include heavy cream, sweetened condensed milk, chocolate syrup, peppermint extract, and crushed peppermint candies. The instructions are simple – just whip the heavy cream until stiff peaks form, then fold in the condensed milk, chocolate syrup, peppermint extract, and crushed peppermint candies. Freeze the mixture for at least 6 hours or overnight, and you’ll have delicious homemade chocolate peppermint ice cream.
Can I make an ice cream cake with the chocolate peppermint ice cream?
Yes, you can make an ice cream cake with the chocolate peppermint ice cream. The recipe for the chocolate peppermint ice cream cake is also provided in the article. It involves making a chocolate cookie crust, then layering the chocolate peppermint ice cream over the crust. Freeze the cake for at least 6 hours or overnight, and you’ll have a delightful frozen peppermint dessert.
Do I need any special equipment to make the chocolate peppermint ice cream?
No, you don’t need any special equipment to make the chocolate peppermint ice cream. The recipe is a no churn recipe, so you won’t need an ice cream maker. All you need is a mixer or a whisk to whip the heavy cream, and a container to freeze the ice cream mixture in.
How long does it take to freeze the chocolate peppermint ice cream?
The chocolate peppermint ice cream needs to freeze for at least 6 hours or overnight. This will ensure that it is fully set and has a nice, creamy texture. If you can’t wait that long, you can check the ice cream after 4 hours, but it may still be a bit soft.
Can I add any other toppings to the chocolate peppermint ice cream?
Yes, you can add any toppings you like to the chocolate peppermint ice cream. Some ideas include hot fudge sauce, whipped cream, chocolate shavings, or more crushed peppermint candies. Get creative and have fun with it!