
Are you hosting a dinner party and want to impress your guests with a homemade dessert that will leave them asking for seconds? Look no further than the perfect chocolate shell recipe. This versatile and easy-to-make treat can take your desserts to a whole new level.
One of the key ingredients in a chocolate shell is, of course, chocolate. You should use high-quality chocolate with a high cacao content to ensure a rich and intense flavor. Melt the chocolate over low heat, stirring frequently to prevent it from burning. Once melted, let it cool slightly before adding any other ingredients.
The magic behind the chocolate shell is its ability to harden at room temperature, making it the perfect coating for ice cream sundaes, frozen bananas, or any other dessert you can imagine. The hardened shell creates a crisp exterior that holds the contents together, without the need for frequent trips to the freezer.
But what if you or your guests are dairy-free? Don’t worry, this recipe can be easily modified to be dairy-free by using dairy-free margarine or coconut oil instead of butter. Just make sure to choose a dairy-free chocolate as well, and you’re good to go.
Now, let’s dive into the directions for making the perfect chocolate shell:
- Start by melting the chocolate in a heatproof bowl over simmering water, making sure the bottom of the bowl doesn’t come into contact with the water. Stir until melted and smooth.
- Once melted, remove the bowl from heat and let it cool for a minute or two. This step is important to ensure that the chocolate will harden correctly once it comes into contact with the cold dessert.
- If desired, you can add a pinch of salt or any other flavor variations to the melted chocolate, such as a splash of wine or a sprinkle of cinnamon. Get creative and experiment with different combinations to find your favorite.
- Now, it’s time to dip your dessert into the melted chocolate. Take a frozen banana, an ice cream scoop, or any other treat you want to coat, and dip it into the chocolate until fully covered.
- Once coated, place the dessert on a table or tray lined with parchment paper and let it sit for a few minutes. The chocolate will quickly harden and create a beautiful, solid shell.
- To take it up a notch, you can add a topping to the hardened shell. Sprinkle some crushed nuts, coconut flakes, or even a drizzle of melted white chocolate on top. The possibilities are endless.
Now that you know the science behind the perfect chocolate shell, you can impress your guests with a dessert that goes beyond regular chocolate-covered treats. Get creative, try different flavor combinations, and enjoy the exciting and delicious world of dessert making.
Disclaimer: The article above is for informational purposes only and does not constitute medical or dietary advice. Consult a qualified healthcare professional or nutritionist for personalized recommendations.
Serving the Magic Shell
Once the perfect chocolate shell has hardened, it is ready to be served. The versatile nature of the shell coating allows it to be used in a variety of delicious desserts. Here are a few suggestions for serving the magic shell:
1. Dipping Fruit: One popular way to enjoy the chocolate shell is by dipping fresh fruits, such as strawberries, bananas, or sliced apples, into the hardened shell. The combination of the crisp fruit and the rich chocolate coating is a delightful treat.
2. Topping Ice Cream: Another classic use for the magic shell is as a topping for ice cream. Simply drizzle the melted shell over a scoop or two of your favorite ice cream flavor. The chocolate will quickly harden, creating a deliciously crunchy shell.
3. Making Chocolate-Covered Treats: The magic shell can also be used to make chocolate-covered treats. Dip cookies, pretzels, or even potato chips into the melted shell to create a sweet and salty combination that is sure to be a hit.
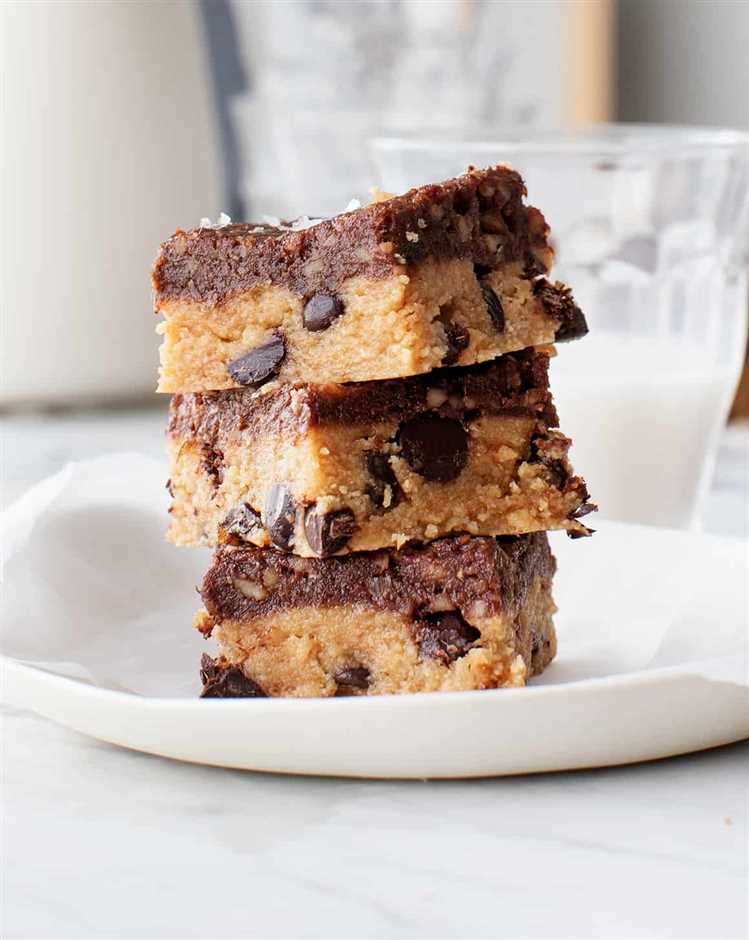
4. Garnishing Desserts: The magic shell can be drizzled over cakes, brownies, or other desserts to add a decorative and delicious touch. The hardened shell adds a glossy finish and a burst of intense chocolate flavor.
5. Beyond Desserts: The uses for the magic shell go beyond desserts. Try using it as a dipping sauce for cheese or as a topping for a decadent hot chocolate or cappuccino. The possibilities are only limited by your imagination!
To serve the magic shell, simply pour it over the desired food item or dip the food into the melted liquid. Allow the shell to harden for a minute or two at room temperature, or place it in the refrigerator for a quick chill. The hardened shell should be stored in a cool, dry place to maintain its crispy texture.
If you find that the magic shell has become too hardened or solid, simply heat it in the microwave or on low heat on the stovetop to melt it back to its liquid form. Be sure to follow the directions on the packaging for melting and reusing the shell.
So go ahead and indulge in the deliciousness of the perfect chocolate shell. Its dairy-free qualities make it a treat that can be enjoyed by everyone. Whether you are hosting a dinner party, enjoying a quiet evening at home, or looking for a fun and exciting treat to serve at a children’s birthday party, the magic shell is the key to creating desserts that go beyond the ordinary.
Flavor Variations
One of the great things about making your own chocolate shells is that you can easily customize the flavor to suit your taste preferences. Here are some suggestions for flavor variations:
1. Dark Chocolate
If you prefer a rich and intense flavor, opt for dark chocolate. Use high cacao content chocolate to achieve that perfect balance of sweetness and bitterness.
2. Milk Chocolate
For a milder and creamier taste, go for milk chocolate. It adds a deliciously smooth and silky texture to your desserts.
3. White Chocolate
If you’re a fan of the sweet and buttery flavor of white chocolate, try using it for your chocolate shells. Just be aware that white chocolate doesn’t harden as much as dark or milk chocolate, so the shells may be slightly softer.
4. Dairy-Free Options
If you’re avoiding dairy, you can still enjoy chocolate-covered treats. Look for dairy-free chocolate options at your local grocery store or health food store.
5. Adding Flavorings
If you want to take your flavor variations a step further, you can add different flavorings to your melted chocolate. Consider mixing in a teaspoon of instant coffee granules for a mocha-flavored shell or a pinch of salt for a sweet and salty combination.
6. Wine-Infused Chocolate Shells
If you want to add a touch of sophistication to your treats, try infusing your chocolate shells with a splash of wine. Simply melt your chocolate and mix in a tablespoon of your favorite wine before dipping your desserts.
Remember to keep in mind that the flavor of your chocolate shell will ultimately depend on the quality and type of chocolate you use. Experiment with different ingredients and find the perfect flavor combination that suits your taste buds!
How to Make Chocolate Magic Shell
Chocolate magic shell is a delicious coating that hardens when poured over ice cream or other frozen desserts. It is made with chocolate and a few key ingredients, which create a crisp and intense chocolate shell that adds an exciting flavor to your favorite treats.
Making it Dairy-Free
If you are looking for a dairy-free option, you can use dairy-free chocolate chips and margarine instead of regular butter. This will give you a similar result with a rich and creamy flavor, perfect for those who are lactose intolerant or prefer dairy-free desserts.
The Science Behind the Magic
Chocolate magic shell uses the properties of chocolate to create its unique texture. When chocolate is melted, it becomes a liquid, but as it cools, it hardens and forms a solid shell. This is due to the cocoa butter content in the chocolate, which becomes hard when cooled.
Ingredients You’ll Need
- 1 cup of chocolate chips (dark or milk chocolate)
- 2 tablespoons of butter or margarine (or dairy-free alternative)
- A pinch of salt (optional)
Directions
- In a microwave-safe bowl, melt the chocolate chips and butter together. Start with 30-second intervals, stirring in between, until the mixture is melted and smooth.
- If desired, add a pinch of salt to enhance the flavor – this is optional but recommended for a more intense taste.
- Let the mixture cool for a few minutes. It should still be pourable, but not hot.
- Pour the chocolate magic shell over your favorite frozen desserts, such as ice cream or frozen bananas.
- Wait a minute or two for the magic shell to harden. You will see it transform from a liquid to a solid coating.
Adding Variations and Other Suggestions
Once you have mastered the basic chocolate magic shell recipe, you can get creative and add different flavors or toppings to enhance your desserts. Here are a few suggestions:
- Try using white chocolate chips instead of dark or milk chocolate for a sweeter flavor.
- Add a teaspoon of cacao powder for an extra rich and intense chocolate taste.
- Experiment with different toppings, such as crushed cookies, nuts, or sprinkles.
Remember to store your homemade chocolate magic shell in a cool place, like the fridge, to keep it solid. You can reheat it in the microwave for a few seconds if it hardens too much. Enjoy your chocolate-covered treats!
Frequently Asked Questions
Here are some common questions that may arise when making chocolate magic shell:
- Can I use other types of chocolate? Yes, you can use different types of chocolate, such as dark, milk, or even flavored chocolate. Just ensure that it is high-quality chocolate for the best results.
- Can I use margarine instead of butter? Yes, margarine can be used as a substitute for butter. Make sure to use a margarine that is suitable for baking or cooking.
- How much chocolate magic shell does this recipe make? This recipe makes approximately 1 cup of chocolate magic shell, but you can easily double or halve the ingredients depending on your needs.
- What can I use chocolate magic shell for? Besides pouring it over ice cream, you can also use chocolate magic shell for dipping fruit, topping cakes or cupcakes, or even adding a touch of excitement to a glass of wine.
- What should I do if my magic shell hasn’t hardened? If the magic shell doesn’t harden after a few minutes, your chocolate mix might be too warm. Cool it down further by placing it in the fridge for a few minutes or adding a bit more melted chocolate to the mix.
Contact us if you have any other questions or need further assistance. Enjoy the magic of chocolate shell!
How to Use
Using this perfect chocolate shell recipe is easy and versatile. Whether you want to coat ice cream, make chocolate-covered desserts, or add an exciting topping to your treats, this recipe will be your key to success.
To start, gather the following ingredients:
Ingredients:
- 1 cup of chocolate chips or chopped chocolate (dark, milk, or white)
- 1 tablespoon of coconut oil or vegetable oil
Directions:
- Place the chocolate chips or chopped chocolate in a microwave-safe bowl.
- Add the coconut oil or vegetable oil to the bowl.
- Microwave the mixture on high for 1 minute, then stir.
- If the chocolate is not completely melted, heat it in 30-second intervals, stirring each time, until smooth and liquid.
- Let the chocolate mixture cool slightly. It should be warm, but not hot.
- If you’re dipping something frozen in the chocolate, make sure it is completely solid and cold. This will help the chocolate harden quickly and create a crisp shell.
- Dip your desired treat into the chocolate, coating it completely.
- Remove the treat from the chocolate and let the excess chocolate drip off.
- Place the chocolate-covered treat on a parchment-lined baking sheet or plate.
- Repeat the dipping process with other treats or ingredients as desired.
- Let the chocolate shell harden at room temperature. This usually takes around 5-10 minutes.
Now that you know how to make the perfect chocolate shell, let your creativity run wild! Here are a few suggestions and variations:
Suggestions and Variations:
- Use dairy-free chocolate chips and coconut oil to make a dairy-free version.
- Add flavor to the chocolate shell by stirring in a teaspoon of instant coffee, a splash of vanilla extract, or a tablespoon of liqueur such as rum or wine.
- Instead of dipping, drizzle the chocolate shell over desserts like sundaes, ice cream cakes, or fruit bowls.
- Experiment with different types of chocolate, such as dark chocolate or high-cacao content chocolate, to create more intense flavors.
When it comes to storing the chocolate shell, keep it in an airtight container at room temperature. It will stay hardened for several days, and you can simply reheat it briefly in the microwave to make it liquid again when needed.
If you have any questions or need further suggestions, don’t hesitate to ask your host or food science enthusiast. Enjoy the magic of this perfect chocolate shell in your desserts!
How to make chocolate shell Ice cream topping
If you’re a chocolate lover, chances are you’ve had the delight of biting into a perfectly crispy chocolate shell coating on your ice cream. It adds a delicious and exciting texture to your desserts, and it’s surprisingly easy to make at home. In this article, we’ll explore how to create the perfect chocolate shell ice cream topping.
Ingredients:
- 1 cup of dark or milk chocolate
- 1 tablespoon of margarine or butter
- A pinch of salt
Directions:
- Start by freezing your bananas. They should be firm and ripe, as they will serve as the base for your ice cream.
- In a microwave-safe bowl, melt the chocolate and margarine or butter in short 30-second intervals, stirring in between, until smooth and fully melted.
- Add a pinch of salt to enhance the flavor of the chocolate. You can also add other flavor variations, such as a splash of vanilla extract or a few drops of your favorite wine.
- Stir the ingredients until well combined and the chocolate mixture is smooth.
- Take your frozen bananas out of the freezer and coat them in the melted chocolate mixture. You can use a spoon or tongs to evenly distribute the coating.
- Place the coated bananas on a tray lined with parchment paper and let them sit for a few minutes to allow the chocolate to harden. For a faster setting process, you can place the tray in the freezer for 5-10 minutes.
Once the chocolate has hardened, your chocolate shell ice cream topping is ready to be served. You can enjoy it as-is, or use it to enhance the flavor of other desserts, such as cakes, pies, or even as a dipping sauce for fruit.
It’s worth noting that this recipe uses dairy-free margarine or butter, making it a great option for those following a dairy-free or vegan diet. However, you can use regular butter if you prefer.
Storing the chocolate shell topping is easy. Simply transfer any leftovers to an airtight container and keep it in the refrigerator. The chocolate shell should stay solid for a week or so, making it perfect for last-minute dessert ideas or unexpected guests.
Now that you know the key ingredients and directions, have fun experimenting with different flavor variations. You can try using white chocolate instead of dark or milk chocolate for an intense and unique flavor. Additionally, you can add cacao nibs or other toppings to the chocolate coating to give it an extra crunch or texture.
So go ahead and treat yourself and your guests to a delicious dessert with a chocolate shell ice cream topping. The chocolate coating adds a magical touch to any treat, and you’ll be sure to impress with your homemade creation!
If you have any questions or need further suggestions, feel free to contact us through our website. We’re always here to help you create the perfect chocolate shell topping for your desserts!
Serving Suggestions
Once you have mastered the perfect chocolate shell recipe, you will need some exciting serving suggestions to take your desserts to the next level. The chocolate shell is a versatile ingredient, and it can be used in many ways to enhance the flavor and presentation of your treats. Here are some ideas to get you started:
1. Dipping
The most common use of the chocolate shell is for dipping. You can dip a variety of ingredients into the melted chocolate, such as strawberries, bananas, or pretzels. The hard, crisp chocolate coating adds a delicious touch to any food. Just make sure to add a pinch of salt to balance out the sweetness.
2. Ice Cream Topping
The chocolate shell is the perfect topping for ice cream sundaes. Once the chocolate has hardened, it forms a solid layer on top of the ice cream. Add some crushed nuts or sprinkles for an extra touch of flavor and texture.
These are just a few of the many possible uses for the chocolate shell. Get creative and experiment with different ingredients and flavors to discover your own unique creations. The key is to have fun and enjoy the magic of chocolate!
When it comes to storing the chocolate shell, it is best to keep it in a cool room or refrigerator. This will help to maintain its crisp and hard texture. If you want to take your desserts to the next level, try adding a drizzle of melted white chocolate or a sprinkle of cacao powder on top of the cooled shell. This will add an extra layer of flavor and make your treats even more delicious.
For those with dietary restrictions, you can also make a dairy-free version of the chocolate shell by substituting margarine or dairy-free butter for the regular butter. The science behind the chocolate shell is fascinating, and by understanding the key ingredients and their properties, you can create the perfect chocolate coating every time.
If you have any questions or need further assistance, feel free to contact us. We are here to help you make the most of your chocolate shell and create delicious desserts that will impress your guests.
Storing the Magic Shell Topping
Once you’ve made the perfect chocolate shell topping, you’ll need to know how to store it properly to maintain its magical properties. Here are some suggestions:
1. Splitting into Separate Containers
If you’ve made a large batch of magic shell topping, you can split it into smaller containers to make it easier to use and store. This way, you can take out just the amount you need without exposing the rest to air or temperature changes.
2. Room Temperature Storage
The magic shell topping is best stored at room temperature. Avoid placing it in the refrigerator or freezer, as extreme cold can cause it to harden too much or develop a grainy texture. However, if your surroundings are very hot, it may be necessary to store it in the fridge to keep it solid.
3. Using Sealed Containers
To prevent moisture and air from affecting the magic shell topping’s consistency, store it in an airtight container. This will help preserve its liquid state until you’re ready to use it. Mason jars or glass containers with tight-fitting lids work well for this purpose.
4. Beyond Chocolate-Covered Sundaes
While pouring the magic shell topping over ice cream is the most popular use, don’t limit yourself to just this dessert. Get creative and explore other exciting ways to incorporate the chocolate shell topping. Use it for dipping fruits like bananas or strawberries, layer it into a parfait, drizzle it over a cake, or add a dollop to your favorite hot beverage for a flavorful twist.
5. Dairy-Free Variations
If you need a dairy-free option, you can easily modify the magic shell topping recipe to suit your dietary needs. Simply replace the butter with a plant-based margarine or coconut oil. This substitution will still allow the topping to harden when poured over cold food.
6. Storing Made-With-Wine Variations
If you have made magic shell topping using wine, it’s essential to store it properly. Remember that wine contains alcohol, which can prevent the topping from completely hardening. Keep wine-infused magic shell topping in the refrigerator to maintain its desired consistency.
7. Frequently Asked Questions
- Q: How long can I store the magic shell topping?
- A: The magic shell topping can be stored for up to a month, but it’s best to use it within two weeks for the most delicious results.
- Q: Can I reheat the hardened magic shell topping?
- A: Yes, you can microwave the hardened topping for about 30 seconds on high or until it becomes liquid again. Remember to let it cool before serving.
- Q: Can I freeze the magic shell topping?
- A: It’s not recommended to freeze the magic shell topping as it may lose its desirable texture and flavor.
By following these storing suggestions and frequently asked questions, you can enjoy the deliciousness of the magic shell topping and explore its various uses beyond chocolate-covered sundaes.
Other Delicious Desserts
Aside from using the chocolate shell recipe as a dipping coating for ice cream sundaes, there are many other delicious desserts you can make with it. The possibilities are endless!
One of the key variations you can try is adding different flavors to the chocolate shell. You can mix in some melted white chocolate for a sweeter taste, or add a pinch of salt to enhance the flavor. Another exciting option is to use flavored oils like mint or raspberry to give your chocolate shell a unique twist.
If you’re looking for a dairy-free option, you can use margarine instead of butter in the recipe. This will still give your desserts a crisp and hardened shell without the use of dairy. Just make sure to use a dairy-free chocolate to keep it completely vegan.
For a fun and creative dessert idea, try making chocolate-covered fruit. You can dip strawberries, bananas, or any other fruit of your choice into the chocolate shell mixture and let it harden. The result is a delicious treat that combines the sweetness of the fruit with the rich flavor of the chocolate shell.
Another suggestion is to make chocolate-coated nuts. You can choose your favorite nuts, such as almonds or peanuts, and coat them in the chocolate shell mixture. Once they have hardened, you’ll have a crunchy and decadent snack.
If you’re hosting a dinner party or special occasion, you can use the chocolate shell to create a stunning dessert presentation. Consider using it as a topping for ice cream sundaes, cakes, or pies. You can also drizzle it over a plate of fresh fruit for an elegant and delicious finish.
When making these desserts, keep in mind that the chocolate shell hardens quickly once it’s removed from the heat. It’s best to follow the directions and have all your ingredients and tools ready to go. Also, the chocolate shell is best used at room temperature, so if you need to store it for later use, make sure to keep it in a cool, dry place.
One frequently asked question is how much chocolate shell does the recipe make? It depends on the size of your servings, but a good estimate is that one batch will make enough coating for about 6-8 sundaes or a few dozen chocolate-covered treats.
Now that you know how to make the perfect chocolate shell, the possibilities for delicious desserts are truly endless. Get creative, experiment with different flavors and ingredients, and take your desserts to a whole new level!
If you have any other questions or need further suggestions, please don’t hesitate to contact us. We’re here to help make your dessert-making experience as exciting and delicious as possible.
FAQ
What is the science behind the chocolate shell?
The science behind the chocolate shell lies in the properties of chocolate and the addition of a fat source, typically coconut oil. When the magic shell is drizzled onto a cold surface, the coconut oil solidifies, creating a hard shell on the chocolate.
How do I make chocolate shell ice cream topping?
To make chocolate shell ice cream topping, you will need chocolate chips and coconut oil. Melt the chocolate chips and coconut oil together, and then drizzle the mixture over your ice cream. It will harden almost instantly, creating a delicious and crispy shell.
Are there any flavor variations for the chocolate shell?
Yes, you can easily customize the flavor of your chocolate shell by adding different extracts or spices. For example, you can add mint extract for a refreshing twist or mix in some cinnamon for a hint of warmth.
What are the key ingredients for the chocolate shell?
The key ingredients for the chocolate shell are chocolate chips and coconut oil. The chocolate chips provide the rich chocolate flavor, while the coconut oil helps create the hardening effect when it comes into contact with cold surfaces.
Can I make the chocolate shell ahead of time?
Yes, you can make the chocolate shell ahead of time. Once it has hardened, you can store it in an airtight container at room temperature. When you’re ready to use it, simply microwave it for a few seconds to soften it before drizzling it over your dessert.
What is the science behind the chocolate shell?
The science behind the chocolate shell lies in the specific composition and structure of chocolate. When chocolate is melted and then cooled rapidly, it forms a solid shell. This is due to the cocoa butter in the chocolate, which has unique crystalline properties that allow it to transform from a liquid to a solid state. The rapid cooling helps to align the cocoa butter crystals and create a smooth and shiny shell.