Craving something sweet and creamy? Look no further than these smooth and irresistible Instant Pot chocolate cups! This easy recipe will have you asking for seconds in no time!
Made with rich and melted chocolate, these delectable dessert cups are perfect for any occasion. Whether you’re entertaining guests or simply want to satisfy your chocolate cravings, these cups are a total crowd pleaser!
What’s great about this recipe is that you don’t need any fancy equipment or techniques. All you need is an Instant Pot, some silicone cupcake liners, and a few simple ingredients!
Here’s how to make these gorgeous chocolate cups:
Delicious Instant Pot Chocolate Cups Recipe – Easy and Irresistible
If you’re looking for a no-churn, easy-to-make dessert that will satisfy your sweet tooth, then these Instant Pot chocolate cups are the ones for you. This recipe combines creamy chocolate with a delicious peanut butter filling, making them an irresistible treat for any occasion.
To make these chocolate cups, you’ll need an Instant Pot, a glass bowl that fits inside the inner pot, and a scalloped mold or cupcake liners. Start by melting the chocolate in the glass bowl on the sauté function of your Instant Pot, stirring until smooth.
Once the chocolate is melted, remove the glass bowl from the Instant Pot and use a spoon or spatula to spread a thin layer of chocolate on the bottom and sides of each cup in the mold. Place the mold in the fridge or freezer to cool and set the chocolate.
In the meantime, prepare the peanut butter filling by mixing peanut butter, butter, and powdered sugar in a bowl until creamy. Remove the mold from the fridge or freezer and spoon the peanut butter filling into each cup, leaving room at the top for the chocolate coating.
Melt the remaining chocolate in the Instant Pot again, and carefully pour it over the peanut butter filling in each cup, using a spoon or spatula to spread it evenly. Place the mold back in the fridge or freezer to cool and set the chocolate completely.
Once the chocolate is set, remove the cups from the mold by gently rotating them and pulling them out. If you used cupcake liners, simply peel the liner away from the chocolate cup. You can also top the cups with a drizzle of caramel or a sprinkle of your favorite fruit or mint for added flavor.
These delicious Instant Pot chocolate cups are the perfect dessert for any gathering or special occasion. They’re easy to make, irresistibly creamy, and they can be customized with your favorite fillings and toppings. Plus, they’re a hit with both kids and adults!
💡 Pro Tip: If you want to make these chocolate cups in advance, store them in an airtight container in a cool, dry place. They should stay fresh for up to a week.
💭 FAQs:
Q: How long does it take for the chocolate to set?
A: The chocolate cups should take about 1-2 hours to cool and set completely in the fridge or freezer.
Q: Can I use a different type of nut butter?
A: Yes, you can substitute the peanut butter with almond butter, cashew butter, or any other nut butter of your choice.
Q: Can I make these cups without an Instant Pot?
A: Yes, you can melt the chocolate using a double boiler on the stovetop instead of an Instant Pot.
Q: What other fillings can I use?
A: You can experiment with different fillings like raspberry jam, caramel sauce, or even pieces of your favorite candy.
Q: How do I remove the cups from the mold without breaking them?
A: To remove the cups, gently rotate them and pull them out from the mold. If they’re stubborn, try rotating them in warm water for a few seconds to loosen the edges.
Q: Can I make these cups in different sizes?
A: Yes, you can use different-sized molds or even a muffin tray to make larger chocolate cups. Adjust the filling and chocolate coating accordingly.
🎥 Check out the video below for a step-by-step tutorial on making these delicious instant pot chocolate cups:
These instant pot chocolate cups are not only a tasty dessert but also a beautiful treat that can be enjoyed any time of the day. Whether you’re serving them at a dinner party or indulging in a late-night sweet craving, these chocolate cups are sure to impress!
Indulge in these heavenly chocolate cups made in an Instant Pot
If you’re a chocolate lover like me, you’re in for a treat with this delicious Instant Pot chocolate cups recipe. These creamy and irresistible treats are perfect for satisfying your sweet tooth. Plus, they’re incredibly easy to make!
When it comes to dessert, there’s nothing better than a decadent chocolate treat. And these chocolate cups are the perfect way to indulge your inner chocoholic. The best part? You can make them right in your Instant Pot!
To make these delicious chocolate cups, you’ll need a few ingredients and some basic kitchen equipment. First, gather your ingredients – chocolate candy melts, peanut butter or other filling of your choice, and any toppings you desire.
Next, follow these easy steps to create your chocolate cups. Start by melting the chocolate candy melts in a microwave-safe bowl. You can also melt the chocolate using a double boiler if you prefer.
Once the chocolate has melted, dip the inside of muffin cup liners or silicone cupcake molds into the melted chocolate. Make sure to cover the sides and bottom of each liner or mold. Place them on a tray lined with parchment paper.
While the chocolate cups are cooling and hardening, prepare your filling. You can use peanut butter, caramel, fruit, or any other creamy filling you desire. Spoon your filling of choice into the chocolate cups, filling them about half-way full.
When the chocolate cups are filled, top them off with more melted chocolate to seal the filling inside. You can also swirl in different flavors or add a drizzle of melted chocolate for decoration.
After you’ve filled and sealed all the chocolate cups, place them in the refrigerator to set. This will take about an hour, or you can speed up the process by placing them in the freezer for about 30 minutes.
Once the chocolate cups have set, remove them from the liners or molds. You may need to gently pull the sides of the liner away from the chocolate to release it. Then, serve your delectable chocolate cups and enjoy!
If you want to get creative, you can try different flavors and fillings for your chocolate cups. Mint, caramel, or even a no-churn mousse would be delicious options. The sky’s the limit!
These heavenly chocolate cups are perfect for parties, special occasions, or simply whenever you’re craving a sweet treat. They’re also a hit with kids, who love the surprise of the creamy filling inside.
To store your chocolate cups, place them in an airtight container in the refrigerator. They should stay fresh for up to a week, although let’s be honest – they won’t last that long!
In conclusion, these Instant Pot chocolate cups are a real crowd-pleaser. They’re surprisingly easy to make and can be customized with different fillings and toppings. So, grab your Instant Pot and give this delicious recipe a try. You won’t be disappointed!
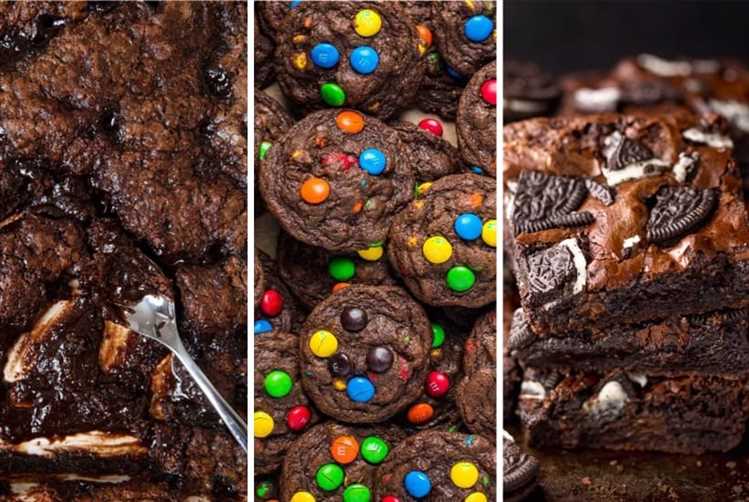
Simple recipe with intense chocolate flavor
If you’re a chocolate lover, then you’ll absolutely adore these delicious Instant Pot Chocolate Cups. They are easy to make and have an intense chocolate flavor that will satisfy your sweet tooth.
To make these chocolate cups, you’ll need a few simple ingredients that you probably already have in your kitchen. Here’s what you’ll need:
| – | 1 cup of chocolate chips (your choice of dark, milk, or white chocolate) |
| – | 1 tablespoon of butter or coconut oil |
| – | A pinch of salt (optional) |
| – | Assorted toppings of your choice (such as nuts, fruit, or candy) |
To start making these delicious chocolate cups, you’ll first need to melt the chocolate chips and butter together. You can do this in the Instant Pot on the sauté setting, or in a microwave-safe bowl in the microwave. Just be sure to melt the chocolate in short intervals and stir frequently to prevent it from burning.
Once the chocolate has melted, remove it from the heat and immediately dip the top half of each balloon into the melted chocolate. Then place the chocolate-coated balloons on a baking sheet lined with parchment paper and let them cool until the chocolate hardens.
After the chocolate has hardened, you can gently peel away the balloons, leaving you with beautiful chocolate cups. If there are any remaining bits of balloon stuck to the chocolate cups, just use a pair of tweezers to remove them.
Now it’s time to fill the chocolate cups with your favorite toppings. You can fill them with anything from peanut butter to mint ice cream to fresh fruit. The sky is the limit! Just be sure to keep the filled chocolate cups in a cool place until you’re ready to serve them, as the chocolate can melt at room temperature.
These Instant Pot Chocolate Cups are not only delicious, but they’re also a fun and unique way to serve desserts. Your guests will be amazed at the homemade chocolate cups and their intense flavor. So give this simple recipe a try and enjoy the irresistible taste of these delightful treats!
What to Serve in a Chocolate Bowl
Chocolate bowls are a fun and creative way to serve desserts, and they’re sure to impress your guests. Whether you’re hosting a special occasion like Valentine’s Day or simply want to treat yourself, chocolate bowls add an extra touch of elegance to any dessert. Here are some delicious and decadent ideas for what to serve in a chocolate bowl:
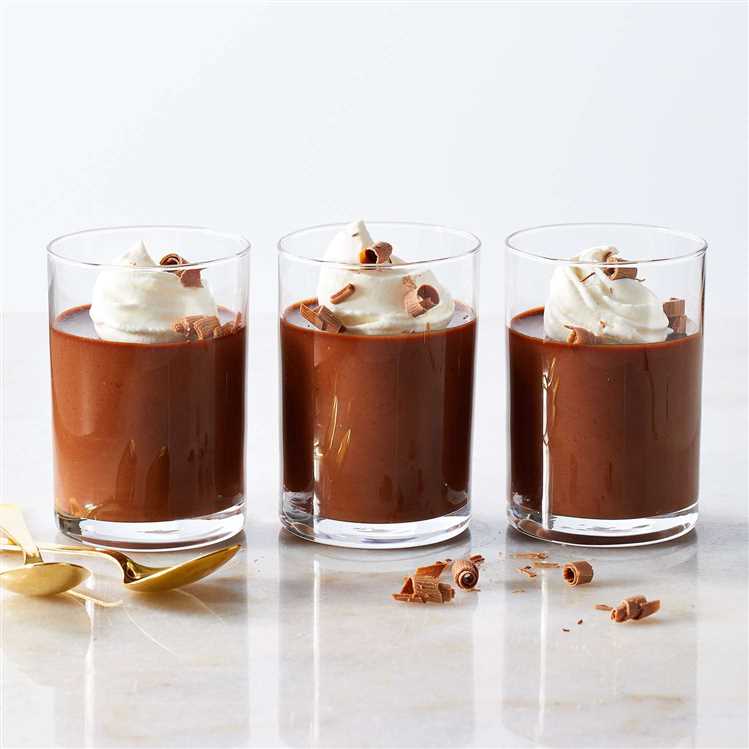
1. Chocolate Mousse
Smooth and creamy chocolate mousse is a classic choice for filling chocolate bowls. The rich and airy texture of the mousse pairs perfectly with the indulgent taste of the chocolate. You can garnish it with fresh berries or a dollop of whipped cream for added sweetness.
2. Ice Cream
What could be better than a scoop of ice cream served in a chocolate bowl? The combination of the cold and creamy ice cream with the warm and melty chocolate is simply heavenly. You can use any flavor of ice cream you like, but mint chocolate chip or peanut butter cup are always popular choices.
3. Fruit Salad
If you’re looking for a healthier option, a fruit salad served in a chocolate bowl is a great choice. The sweetness of the fruit complements the chocolate perfectly, and it’s a refreshing and light dessert option. You can use a mix of your favorite fruits like berries, melons, and citrus for a colorful and nutritious treat.
When making your chocolate bowls, there are a few things to keep in mind. First, you’ll need the right equipment, such as balloons or muffin pans, to shape the bowls. Balloons are a popular choice because they’re easy to work with and create beautiful scalloped edges. Make sure to temper the chocolate properly to avoid any issues with the final product.
Here’s a quick summary of the instructions for making chocolate bowls:
- Melt your choice of chocolate in a heat-safe bowl over a pot of simmering water, or use the microwave.
- Dip the balloons halfway into the melted chocolate, rotating them to create a smooth and even coat.
- Place the dipped balloons on a tray lined with parchment paper and refrigerate until the chocolate hardens.
- Once the chocolate has set, gently deflate the balloons and remove them from the chocolate bowls.
Now that your chocolate bowls are ready, you can fill them with your desired dessert. Serve them at room temperature for the best flavor and texture.
Whether it’s for a special occasion or just a fun treat, serving dessert in a chocolate bowl is sure to impress. Let your creativity run wild and experiment with different flavors and fillings. The possibilities are endless when it comes to these delicious chocolate creations!
Explore creative and delicious options for filling chocolate bowls
When it comes to delicious and creative dessert options, chocolate bowls are hard to beat. Not only do they make a stunning presentation, but they also provide an irresistible combination of rich, melty chocolate and a delectable filling. Whether you’re serving them for a special occasion like Valentine’s Day or just want to treat yourself, there are endless possibilities for what to fill these chocolate cups with.
One simple and easy option is to fill the chocolate cups with a classic chocolate mousse. This light and airy dessert pairs perfectly with the rich chocolate shell, creating a indulgent treat. You can also experiment with different flavors and add-ins like mint or caramel swirls to take it to the next level.
If you’re in the mood for something creamy and smooth, you can try filling the chocolate cups with a tasty custard. The velvety texture of the custard combined with the crispy chocolate shell is a match made in heaven. You can also add some fresh fruits or nuts to add a pop of flavor and texture.
For those who love the combination of sweet and salty, filling the chocolate cups with a caramel sauce is a great option. The gooey caramel perfectly complements the bittersweet chocolate and adds a satisfying contrast of flavors. You can also sprinkle some sea salt on top for an extra touch of indulgence.
If you’re looking for a lighter option, you can fill the chocolate cups with a no-churn ice cream or sorbet. These frozen treats melt slowly, so you can enjoy the chocolate and the filling together without worrying about a messy dessert. You can experiment with different flavors and even swirl them together for a beautiful and delicious effect.
Another fun option is to fill the chocolate cups with a medley of fresh fruits. The sharp sweetness of the fruits contrasts beautifully with the rich chocolate, creating a refreshing and satisfying combination. You can use a variety of fruits like strawberries, raspberries, blueberries, or even tropical fruits for a burst of flavor.
To make the chocolate bowls, you’ll need some balloons that are resistant to the warm temperature. Fill the balloons with warm water, but make sure not to overfill them. Dip each balloon in melted chocolate, coating them evenly. Place them on a tray lined with parchment paper and let them cool until the chocolate hardens.
Once the chocolate bowls are ready, you can gently remove the balloons by deflating them and pulling them away from the chocolate. Make sure to be gentle and slow to avoid any accidents or breaking the chocolate bowls. Fill each chocolate bowl with your desired filling using a spoon or a spatula.
These gorgeous chocolate cups are the perfect dessert to serve at a dinner party or to impress your family and friends. The best part is that you can customize them with your favorite flavors and ingredients. Get creative and experiment with different combinations to find your ultimate chocolate cup recipe.
Now that you know some creative ways to fill your chocolate bowls, it’s time to get to work in the kitchen. Gather your ingredients, follow the instructions, and let your imagination run wild with different filling ideas. Your taste buds will thank you!
FAQ
How do I make chocolate cups using an Instant Pot?
To make chocolate cups using an Instant Pot, you will need silicone cupcake liners, chocolate chips, and any desired toppings. First, melt the chocolate chips in the Instant Pot using the “saute” function. Once melted, pour a spoonful of the melted chocolate into each silicone cupcake liner. Use a spoon or brush to evenly spread the chocolate up the sides of the liners, creating a cup shape. Place the chocolate cups in the refrigerator to harden. Once hardened, gently remove the silicone liners, and fill the chocolate cups with your favorite treats or desserts.
Can I use any type of chocolate for this recipe?
Yes, you can use any type of chocolate for this recipe. Whether it’s semi-sweet, milk, dark, or white chocolate, the choice is up to you. Just make sure to use high-quality chocolate for the best flavor and texture. Different types of chocolate will result in slightly different tastes and appearances, so feel free to experiment and find your favorite combination.
What kind of toppings can I use for the chocolate cups?
You can use a variety of toppings for the chocolate cups. Some popular options include sprinkles, chopped nuts, crushed cookies, mini candies, fresh berries, or a dusting of powdered sugar. You can even fill the chocolate cups with whipped cream, mousse, ice cream, or any other sweet filling you desire. The toppings and fillings are completely customizable to your taste preferences.
How long do the chocolate cups need to harden in the refrigerator?
The chocolate cups typically need to harden in the refrigerator for about 1-2 hours. However, the exact time may vary depending on the thickness of the chocolate and the temperature of your refrigerator. To speed up the hardening process, you can place the chocolate cups in the freezer for 30 minutes. Just make sure not to leave them in the freezer for too long, as they may become too hard and difficult to eat.